...And now for Part Dos. Today I'll talk about the alterations I made to Sydney and the background.
Background
Again, here are the "before" and "after" shots of the painting:
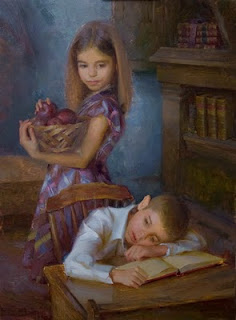 |
| Before |
 |
| After |
The most obvious changes to the background are the deletion of the far desk (for simplicity) and the addition of the baseboard (to give my setting greater believability). I also darkened along the lower left side per my original value study in Stage 3.
Squint down at the "before" image above (squinting helps to accurately compare shades of dark and light, which are called "values"). Do you see how the lightest value of the blue wall is nearly as light as Sydney's face? Although I wanted Sydney's face to be darker than Jackson's, I also wanted her face to be lighter than anything else in the background, so I darkened the lighter parts of the wall.
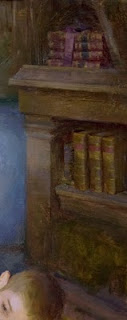 |
| Before |
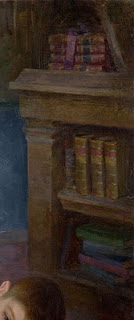 |
| After |
I further corrected the angles of the bookshelves and added books to the bottom shelf. Also, I established more depth between Jackson's head and the bookshelf behind it. I did this by softening some edges and simplifying some shapes in the area behind Jackson's head to make that area recede and darkening Jackson's hair a bit to bring his head forward.
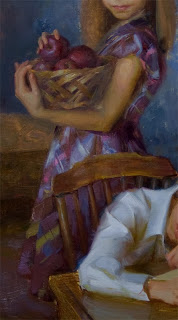
Sydney
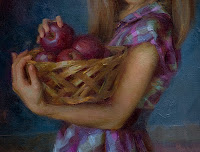
What did I change on Sydney? Well, it would be easier to tell you what I
didn't alter. Her hands, basket and apples were the only parts that escaped getting reworked!
 |
| Before |
|
 |
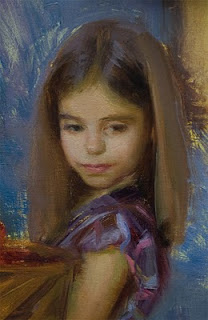
| After |
|
This time around, I took my time on Sydney's head to establish a more accurate drawing, softer edges and livelier color. Also, I think I was better able to capture the spark of kindness in her expression that I needed to tell my story.
 |
| Before |
|
 |
| After |
|
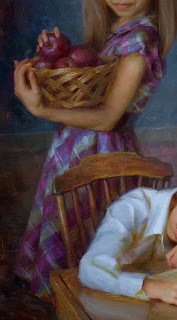
I had left Sydney's dress quite unfinished. As I reworked it, one of my goals was to use the dress as a device to attract the viewer's eyes up towards Sydney's face. To do this, I darkened the lower part of the dress to make it look like Sydney's torso and head were emerging into the light (the eye is usually more attracted to areas receiving light). This was a challenge. Not only did I have to gradually lighten and cool each color of the plaid pattern as it emerged into the light, but also I had to make each value and temperature correctly relate to each other within each region of the gradation. Furthermore, I had to paint with the flair of Sargent or else face certain arrest by the Art Police. Talk about pressure! Just kidding on that last part. I evaded capture in spite of failing at Sargent-flair. And just for the record, the concept of "Art Police" is original to
Mr. Schmid. I approached the challenge of the dress the same way I did Jackson's face (for details, check Stage 12, Part 1). First, I mixed large piles of paint that matched each color of the plaid pattern in the light. Then I mixed about 3 more versions of each of these colors, each one progressively darker and warmer. I laid out all these color piles in an organized fashion on my palette. Then, with all of my main colors pre-mixed, I could focus on flailing away with some looser brushwork! I have heard that
Whistler would also mix an array of colors in large piles beforehand, so it must be OK!
When I painted the initial block-in of Sydney's dress, I messed up the edges of the chair spokes. Comparing the before and after shots above, you'll notice these have been fixed.
 |
| Before |
 |
| After |
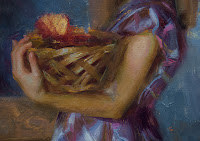
I sculpted the anatomy of the arm more fully and carefully than before. It's always a challenge to not oversimplify subtle anatomical forms, but especially so on children, whose anatomy is softened. On the flip-side, overstating anatomy can also be dangerous.
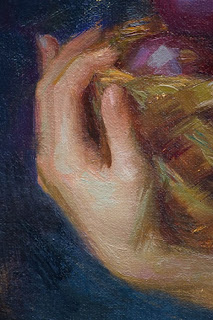 |
| Detail |
Final words
Whew! That was a lot of repainting, wasn't it? So how do I know when an area of a painting is "finished"? When I don't know what else I can do to make it better (to paraphrase modern master
Morgan Weistling), and when I'm satisfied that I've done my best.
Thank you again for joining me on this venture! I praise the Lord for His great help with this painting. Have a great day, everyone!
Until next time,
Adam Clague


Thanks for sharing your progression. Very interesting and informative. Great painting!
ReplyDeleteThank you, Karla! I'm so glad you enjoyed it.
ReplyDelete